My Idea of Improving the Winchester 94 .357 Trapper
By Tycer Lewis
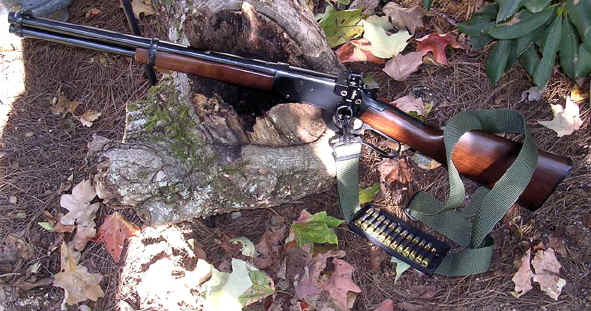
I had wanted a Marlin 1894C for a long time to complement my .357 revolvers. During my search I ran across a sweet Winchester 94 Trapper with a crossbolt safety for a price I could not pass up. I really liked the look, fit and finish were good, and the walnut was very attractive. My first Winnie.
My first trip to the range proved promising. Everything from full .38 wadcutters to 38 specials to hot .357 loads shot decent groups, and nose profiles from RFN to WFN to wadcutters cycled flawlessly. I finally had the perfect companion for my revolvers. Or was it?
As I became more acquainted with the little rifle, things began to show up I didn’t like. The action had some spots that would sort of catch, the trigger - goodness, who would create a trigger with a half inch of travel before it would even think of releasing? The factory sights were OK, but not great. Jacketed loads shot better than proven published cast loads, and lastly, that crossbolt safety is just plain ugly!
Installation of a Williams FP was easy and resulted in immediate shrinking of 100yd groups. NOTE Underlined text will direct you to associated links.
Then it was time to take her apart and see if I could fix that action and trigger. This article by Junior Doughty was a perfect disassembly tutorial. The tips on accurizing the 94 by Paco Kelly was excellent, though it seems the folks at Winchester addressed a couple of the points in his article for the newer model 94s. I hope they thanked him for the directions. Also, the Mohave Gambler has an article on smoothing the action of the 94.
Once apart I polished all the wear areas, changed the hammer face angle where the bolt first touches, removed a little wood in the forearm, trimmed a couple of coils off the replacement spring I bought from Numrich, put it back together with the bands just tight enough to hold without gripping the barrel. WOW, what a difference! The action is really smooth. I spent all of maybe two hours on the whole shebang. To the range!
By simply removing just enough wood (not even a teaspoonfull of shavings) to have the forearm touch only at the band, and not tightening the band screws too much, my 100yd groups had shrunk in half. Cast loads better, but still not where they should be.
My friend and shooting mentor Yancey showed me how to do a throat slug so I could size my bullets .002” fat and seat them out to where the rifling just barely engraves a cast bullet, or seat .002 away for jacketed. I learned that for optimum accuracy I need to size to .359” and seat to 1.85”. Yep, 1.85”! Compare that to the 1.57 I had previously seated them to. That really made the difference in the accuracy of the cast loads! I eventually started using 360 Dan Wesson brass to get more bearing in the case. Any accuracy I gain with the Dan Wesson brass is not noticable, but I like having that extra brass around the bullet. I did have to modify the cartridge guides to allow the extra length to cycle , but I used purchased guides, so my factory ones are still as new. Wadcutters and light bullets in .38 brass will occasionally spit out before chambering, but two screws and 30 seconds later the original guides could be back in if it bothered me. I so rarely shoot anything in .38 cases I have not felt the need to swap them.
She levers, she shoots........but that trigger!
Much has been written on the 94 tang swap, so i went for it. I found a complete coil spring type ( there are several types), removed the buttstock and the hammer pivot screw and voila, adios rebounding hammer, hello crisp trigger! I had had occasional light strikes with the old set-up - not anymore! Good sharp pin strikes every time, an added bonus.
Now that I have the half-cock safety with the new tang assembly, it’s time to ditch that eyesore crossbolt safety. After removing the safety bar, I was left with the task of filling the holes. I chose to use a case head on the right and make a threaded space on the left for my aperture sight insert. Loctite gray knead-type epoxy proved to be the ticket for both.
This little Trapper has proved to be the most fun, versatile gun I’ve ever owned.
Take care and God bless.
Tycer